Saturday, October 30, 2010

Witches' Fingers Cookies

When I first saw these on Chloe Coscarelli's blog, I thought: ew.  No way would I want to eat something that looks so much like a real finger.  But then I thought... YES.

So they're sort of like an evil version of ladyfinger cookies, no?

I've been amazed at the amount of creativity hitting the vegan blogs recently.  Besides this recipe on Chloe's blog, the Wing-It Vegan declared the entire month of October Halloweegan and has served up one absolutely ridiculous recipe after another, including mummy dogs and mashed potato ghosts, and a coffin cake.  I can only imagine that November--the Vegan Mo[nth of] Fo[od], sort inspired by National Novel Writing Month--will prove even more chock full of silly creativity.

This recipe worked really well, though I had a few challenges along the way.  First, no matter how many times I do it, I always forget how to blanch almonds.  Here is how: pour boiling water over the raw almonds so that they're covered; let stand 60 seconds, then drain.  The skins should now be looser, and you can squeeze the almonds out of them.  If you don't work fast enough, the almonds dry up again and you have to start over.

The dough for this cookie is a little bit like a pie crust: you cut in the shortening, and there's a lot of it.  There's really no other liquid except for the extracts (I added almond as well as vanilla), and if it seems like the dough isn't going to hold together, you might need to drizzle a tiny bit of warm water as you're mixing.

I'd like to take this moment to share my secret to baking with earth balance--this technique does measuring and softening all at once.  I fill a pyrex measuring cup with warm water up to the 1 c mark, then I add scoops of earth balance until the water is at the level such that [measurement] - [1 c] = [desired amount].  I quickly then drain out the water before the earth balance melts, and ta da!  Measured and softened earth balance, ready to use.

Another thing to note about this recipe is that the cookies expand quite a lot, and this is more important when your cookies have a real-life referent they're supposed to resemble, as they do here.  The cookies that started bigger than a pinky ended up ENORMOUS.  Not that witches can't have large hands, I guess...


So you bake the cookies when they look like the above picture, then when they're done and cooled, you actually take the almonds out, put jam in there, and put the almonds back.  Time-consuming work.  What made this most challenging was that the jam I had was really chunky.  I tried to pipe it using a pastry bag/tip combo, but big cherry chunks kept clogging it up, and when they did come out, then there was too much jam in the "nail bed" (ew) to be able to replace the almond.  SO here's what I did: I blended the jam with a little bit of water, which made it smoother and thinner; then it worked beautifully (but you have to be careful not to let it get too runny).

Fingernail Materials

I thought these cookies would be more about looks than flavor, but they actually taste really great, what with the high butter content and especially the almond extract I added.  I think they taste a lot like the spritz cookies my family used to make for the holidays.  They have a nice melt-in-your-mouth texture, too.

Oh, and I had company again.

Update, 10/29/11: I remade these and realized I'd forgotten to add almond extract to the recipe (highly recommended), and that you need nowhere near as many blanched almonds as 1 1/2 c.  Recipe below has been updated.


Trick or treat I can haz cookies?

Happy Halloween!


Witches' Fingers Cookies
(adapted from Chef Chloe)

Ingredients
2 c flour
1 c powdered sugar
1/2 tsp baking powder
2 tsp Ener-G egg replacer
1 c softened vegan margarine (I use Earth Balance non-hydrogenated Buttery Spread)
1 TB pure vanilla extract
1/2 tsp almond extract
1/2 c blanched whole almonds
1/4 c cherry (or other red) jam (thinned and blended with water, if necessary)
2 TB maple syrup (optional; to brush the almonds)

Instructions
1. Preheat oven to 350* and line 3 baking sheets with parchment paper.  To be quite honest, the oven's going to ready a long time before you are, so you might want to wait to preheat until you get to the decorating stage.
2. Whisk together flour, powdered sugar, baking powder, and egg replacer. Cut in the softened margarine and then add extracts.  Mix until a dough-like consistency has formed.
3. Scoop approximately 2-3 teaspoons of dough into your hand and shape it into a slender finger. Note that the cookies will spread so it is important to shape your cookies to the thickness of a pinkie finger. Use a toothpick to carve knuckle creases and place an almond into the fingertip to act as the nail.
4. Bake for 10 minutes, or until cookies are very slightly browned on the edges.
5. Once cookies are completely cooled, remove the almond nail and paint the nail bed and cuticle with jam; then replace the almond. Brush the almond with a drop of maple syrup to give it a creepier look.  Makes about 45 cookies.

Tuesday, October 19, 2010

Pumpkin Cookies

Did you skip over this post?  This is probably the boringest blog post title ever, especially in October.  Pumpkin everything... ho hum... what a great problem to have.

I'd totally forgotten I blogged about another pumpkin cookie last spring, but looking back at that post, I totally set myself up for this:
"The problem with pumpkin cookies seems to be their tendency to edge towards the pumpkin muffin or pumpkin bread.  What if you actually want a cookie? . . . . here, again, I ended up with tasty little bites of pumpkin bread."

Well, um... ta da!  Leave it to the PPK people to solve the mystery by cooking down canned pumpkin to reduce its moisture content.  Do note: 45 minutes is a really long time to wait for your pumpkin to become cookie-worthy.  Plan ahead accordingly.  This recipe was interesting for a few other reasons: it called for "shortening" rather than vegan butter or margarine, so I took this literally and used Earth Balance's shortening sticks, which I think resulted in a more tender texture (but crispy on the outside!).  Finally, the way that this recipe accounts for egg is really interesting.  I think that the pumpkin actually does some of the work, in the same way that people bake (sad) low fat muffins with applesauce instead of eggs and oil.  But the recipe also calls for cornstarch and a little bit of oat flour, both of which I think contributed to the really great texture.

I made a few minor changes: I liked the green-on-orange contrast of the pumpkin seeds, but didn't have any, so I used pistachios instead (still going through the metric ton of nuts leftover from the salad bar party--a pine nut recipe is also on its way).  I swapped out some white flour in favor of whole wheat flour; honestly, this is more of a texture preference than any kind of lip service to "healthiness" (see, for example, the 1/2 c of shortening).  And then, because I got excited about the spiciness of the cookies, I added some ground black pepper just for fun.  Finally, I did use the 2-bowl method; even though the recipe has you combine the wet ingredients and then just sift the dry into that bowl, when I do this I always end up with weird little zones or pockets of flavor--oh, hello, salt; oh hello, black pepper.  Rinsing out the dry bowl is almost no extra work, anyway.

I think the ruling was pretty unanimous: these cookies were really, really good, eliciting comments such as, "yum what the fuck."  :)  :)  :)

Sell Your Soul Pumpkin Cookies

Ingredients
1 c canned pumpkin
1/2 c shortening
1/2 c sugar
1/2 c brown sugar
1 tsp vanilla
1 c white flour
1/2 c whole wheat flour
1/4 c oat flour (made by grinding oatmeal in a clean spice/coffee grinder)
2 TB cornstach
1 1/2 tsp cinnamon
1 tsp ginger
1/2 tsp nutmeg
1/4 tsp cloves
1/2 tsp baking powder
1/2 tsp salt
pistachios or pumpkin seeds (optional)

Instructions
1. Reduce the pumpkin by cooking in a saucepan over very low heat for 45 minutes or more.  The pumpkin should steam but not bubble; stir often.  Cook until the pumpkin is only 1/2 c (this takes a long time).  Then, set aside and let cool.
2. Preheat oven to 350*.  Line two (or three) baking sheets with parchment paper.
3. In a large bowl, cream shortening and sugars, then mix in cooled pumpkin and vanilla.
4. In a second bowl, combine remaining ingredients (excepting nuts or seeds).  Then add dry to wet, and mix to combine.  Form dough into little balls with your hands, then smush lightly as you put them on the baking sheets.  Top with pistachios or pumpkin seeds as desired.
5. Bake for 10-12 minutes, or until bottoms are lightly brown.  Allow to cool a few minutes on the baking sheets before transferring to a cooling rack.  Makes 2 dozen or more.

Sunday, October 17, 2010

Sesame Cookies with Maple-Tahini Icing

Starring the sesame seed!  If you don't like sesame seeds, do not make this cookie.  Check out the ratio of sesame seeds to dough (at right)!

And, who knew you could make frosting out of nothing but maple syrup and tahini? 

Regarding icing, you do need to time things right: if you make the icing too far in advance, it might harden (though mine never really did); if you start making it too soon, you'll have to wait til your cookies have cooled enough.

These weren't my favorite cookies ever, but they were still pretty nice.  The sesame seeds give a really neat texture to the cookie, but I think I'd like it even better if it were less cakey and more shortbready; perhaps I'll use earth balance next time instead of oil.  And, tahini is a pretty strong flavor in the icing--it's almost slightly sour.  Anyway, these cookies were lovely with an afternoon coffee yesterday, when it was wet and gloomy.  Which is still is today.  Which means...there are more cookie posts on their way...

Sesame Cookies with Maple-Tahini Icing

Sesame Cookies
Ingredients
1/2 c sesame seeds, toasted
1/2 c sugar
1/4 c canola oil
1/4 c nondairy milk
1 tsp vanilla
1/2 c white all-purpose flour
1/2 c whole wheat flour
1/4 tsp sea salt
1/2 tsp baking powder
 
Instructions
1. Preheat oven to 325* and line a large baking sheet with parchment paper (it can do double duty when you get to frosting later).  Toast the sesame seeds (I used a toaster oven), and set them aside to cool
2. Combine the sugar and oil in a large bowl, then add milk and vanilla.  Mix well
3. In a second bowl, combine the flours, salt, and baking powder.  Mix well.
4. Add the contents of the dry bowl to the other bowl, and mix.  Then, stir in the sesame seeds.
5. Form the dough into small balls and place on the baking sheet.  Flatten them with the bottom of a wet glass  or with your fingertips.
6. Bake for 20-25 minutes, or until bottoms are lightly browned (mine weren't super-thin, and I used an insulated sheet, so they took almost 30 minutes)
7. After allowing the cookies to rest on the baking sheet a few minutes, transfer to a rack and cool before frosting with Maple-Tahini Icing (recipe follows).  You can slide the used parchment paper under the cooling rack in preparation for the frosting to come.  Makes about 18 cookies.

*

Maple-Tahini Icing

Ingredients
1/4 c maple syrup
3 TB tahini
1/2 tsp vanilla
pinch salt

Instructions
1. Place the maple syrup in a small saucepan; cook over low heat for about 3 minutes.  Then, turn off heat and mix in the tahini, vanilla, and salt.  Mix vigorously until it's very smooth.
2. Spread some icing on each cooled cookie. Frosts about 18 cookies.

Mexican ("Spanish"?!) Rice

As I made my brunch/lunch yesterday, I had a sneaking feeling that I was being watched.


Sure enough...

There's a whole family of feral cats who live on our property; my neighbors have valiantly caught each of them, one at a time, taken them to be fixed, and brought them back.  They are, therefore, both a feral and a sterile family.

I rather love how from a distance it looks like he's hovering in the air at window height.

Anyway, yesterday I made a Tofu Scramble and decided to make some rice to go along with it.  Since the scramble had some Mexican-ish flavors (cumin, cilantro), I thought of that slightly tomatoey rice that appears so often in Mexican cuisine.  Oh yeah--it's often called "Spanish" rice.  Really?  Giving the English-speaking, Spanish-rice-eating people of the world the benefit of the doubt, I thought "maybe it originally comes from Spain."  But after googling it... yeah... that doesn't seem to be the case.

I used brown basmati rice, which maybe sounds inappropriate unless you the cooking method: sauteeing the rice, onions, and spices first and then adding liquid.  It's actually sort of like the way you might prepare basmati rice or a pilaf.  This cooking method, by the way, resulted in a really great texture: some parts of the rice got a bit browned and chewy.  Supposedly it also brings out more flavor.


Mexican Rice

Ingredients
about 1 TB olive oil
1/2 c brown basmati rice, rinsed
1/2 large yellow onion
2 cloves garlic
1-2 chilies, seeded and chopped
1 tsp ground cumin
1/2 tsp paprika
1/2 tsp oregano
pinch salt
about 3 c vegetable stock (add more as needed)
1 TB tomato paste
diced carrots (I used about half of a large carrot)
1/4 c frozen peas, thawed
1/4 c frozen corn, thawed
juice of 1/2 to 1 lime
cilantro (optional)

Instructions
1. In a medium saucepan, heat the oil over medium-high heat.  Add rice and saute a minute or so, then add onion, garlic, chilies, spices, and salt.  Cook for 5 more minutes or so, until it's very fragrant.  Try not to burn it.
2. Add the stock and tomato paste, bring to a boil, then reduce heat, cover, and simmer until rice is cooked.  For brown basmati, this will be about 40+ minutes; it's shorter with some other types of rice. 
3. Near the end, stir in the carrots, peas, corn, and lime juice, and remove from heat.  Top with cilantro if desired.  Serves about 4.

Tuesday, October 12, 2010

Ginger Ale(s)


I've been thinking about audience and genre as if it were my job or something.  When I post on this blog, to whom am I writing?  To my mom?  To my LA friends who appear in this blog?  To my old co-op mates I haven't seen in a year or two?  To the hot girl I just gave my blog address to (hi)?  To the women in my choir?  To my professors, who are probably wondering where I get all the time to blog?  To the community of vegan bloggers who read each other's stuff?  Or to the anonymous readers around the world who find this blog by googling things like "cookies are not for julia" or "tempeh chocolate corn pie"?

My friend Julia--no, not me--came to visit this weekend from her new home in San Francisco.  She brought me a pretty bottle and two recipes for ginger ale.  Naturally, we had to make both of them.

Circumstances led us to Ralph's for ginger, which was 268% more expensive per pound than it was at Jon's.  O, let me count the ways...

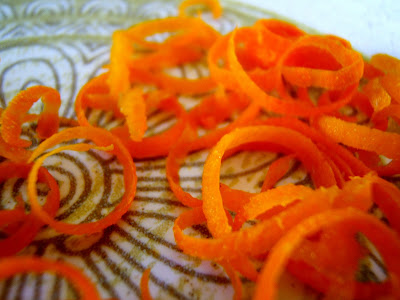
Julia also mastered the art of zesting (at right), and pronounced, "I would rather do this than hang out with some people."

The recipes were great: the first one is not carbonated; it's a syrup you mix with soda water.  It was spicy and flavorful, though if you needed to skip the lemon grass I'm sure you could.

The second recipe is fizzy--so fizzy.  Who knew 1/4 tsp yeast could do so much damage?  I reduced the sugar a bit, because I don't really like sweet things, but not too much, as I knew the yeast needed something to work on.

We made our ales, put them into pretty bottles, and were proud of our work.  We watched with pride and excitement as the yeasted ale got fizzier and fizzier.  Then we decided to put zest in them.

Can you guess where this is going?  This was possibly the biggest mess I've ever had to deal with.  The entire bottle, and tons of ginger shards, and 3/4 c of sugar, all over my kitchen.  Even the ceiling.  In retrospect, I'm glad we opened it after one day; another day and it might have broken the glass.  I guess you have to allow some of the gas to escape during the fermentation process--maybe use a jar and don't close it tightly?

Anyway, they both taste great--especially the fizzy one, though after the sticky geyser there was only about 4 oz left of it.

Spicy Ginger Ale (Non-carbonated)

Ingredients
3 c water
1/2 lb fresh ginger, peeled and grated
1 stalk lemon grass, roughly chopped
1 small chile, chopped
1/4 c sugar
orange zest (optional)
soda water
lime or orange as garnish

Instructions
1. In a medium saucepan, combine water, ginger, lemon grass, chile, and sugar.  Bring to a boil, then reduce heat and simmer 15 minutes, stirring occasionally.  Remove from heat and allow to cool
2. Strain mixture, then transfer to a jar.  Add zest, if using.  Keep refrigerated.  Mix with soda water to dilute and fizzify before serving.  Garnish with lime or orange slices.

*

Fizzy Ginger Ale

Ingredients
1 1/2 TB grated ginger
3/4 c sugar
1/4 tsp active dry yeast
juice of 1 lemon
water to fill bottle

Instructions
Combine ingredients in a jar.  Shake and let sit at room temperature for 2 days. *Don't seal the jar completely or you will have a very sticky geyser on your hands!!*  Serve cold.

Monday, October 11, 2010

Three Sisters Soup

For this soup, I followed rather closely the recipe for "Three Sisters Soup with Cornmeal Dumplings" from the blog Strawberry Pepper.  It made a lot, but it's really hearty and delicious.  The flavors confused me a little bit: the predominant impression I got was of Cajun cooking (onion, bell pepper, thyme, chili seasoning, cornmeal), but then there's also squash, and there's cilantro and lime juice,  Leila, the author, explains that the soup uses "the three sister crops that were the Native American harvest staples: corn, squash, and beans"; I just did some googling and learned more about the history of the relationship between these three for some Native American groups (see wikipedia, for example).  The lime juice gave the soup a nice sour kick, but I wasn't sure that cilantro did much after having been simmered for twenty minutes.  Which reminds me, as much as I liked this soup, the greens and squash were really soft; I would have liked them a little less cooked.

I made only a few changes: first, instead of chili powder, I used paprika, cumin, and cayenne pepper.  Secondly, I only made a half batch of the dumplings, which filled the surface of the soup.  But, then I picked out all the dumplings and ate them, so I had to make more later to add back in.

Finally, I like how in her post on this recipe, Leila writes about the mindfulness that cooking can help cultivate--thinking about where your ingredients, skills, recipes, traditions come from.  The two tomatoes in this soup were a gift to me from my friend Alex's garden--at the time, they were the only two tomatoes to have come from said garden.


Three Sisters Soup with Cornmeal Dumplings

Ingredients
Soup:
1 TB canola oil
1 large onion, diced
4 cloves garlic, minced
2 small or 1 large sweet pepper (e.g. bell pepper, banana, or cubanelle)
1 tsp oregano
1 tsp thyme
1/4 tsp paprika
1/4 tsp cumin
1/4 tsp cayenne
1/2 c beer
4-5 c water or vegetable stock (use at least mostly broth)
1-3 tsp salt (to taste, will depend on the broth you use–but don’t skimp!)
4 c butternut squash, peeled & chopped to 1/2 inch cubes
1 15-oz can pinto beans, drained and rinsed
1 bunch swiss chard, washed and chopped
2 tomatoes, diced
1/4 c cilantro, chopped
2 TB lime juice (or to taste)
*
Dumplings:
1 1/3 c all purpose flour
2/3 c cornmeal
4 tsp packed brown sugar
2 tsp baking powder
1/4 tsp salt
2 TB margarine
1 c soy milk

Instructions
1. In the widest stock pot you have, heat the oil on medium-low heat. Soften the onions, garlic, and peppers for 15 minutes.
2. Add the oregano, thyme, paprika, cumin, and cayenne, and fry for 30 seconds. Add the beer to deglaze the pan.
3. Add the broth/water, salt, and the squash. Bring to a boil, and then reduce to a simmer for 10 minutes.
4. Meanwhile, mix together the dumplings: Add all of the dry ingredients to a large bowl. Use your fingers or a pastry cutter to blend in the margarine until there are no large chunks. Stir in the soy milk, and set the dumplings aside for 5-10 minutes.
5. Add the chopped swiss chard, beans, tomatoes, cilantro, and lime to the stew. Return the pot to a steady simmer over medium-low heat.
6. With wet hands, form the dumplings into ping-pong sized balls (or smaller), and drop each ball on top of the simmering stew. Cover the pot and let it cook undisturbed for 20 minutes, or until the dumplings are puffed up and cooked through. Ladle stew and dumplings into bowls and serve it hot.

Note: If your stock pot is not very wide, you may want to cut the dumpling recipe in half so that they do not crowd the pot. They puff up quite a bit as they steam. I really like the dumplings, so this makes a lot of dumpling as written.

Incoherent Cookie

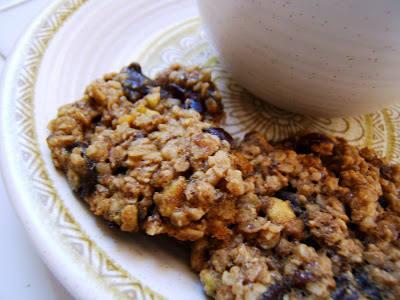
Not too long ago, I threw a salad-bar potluck.  The variety of things we had to put on our salads was pretty incredible!  And, I didn't have to grocery shop for a week.  I'm still left with about ten kinds of nuts and seeds, and I thought I'd take advantage of the surplus by making these cookies with both cranberries and pistachios (as well as walnuts).  Really pretty, no?

Unfortunately, I wasn't thrilled by the consistency of the cookies.  They remained really soft and fragile even after they were cooled.  I think--to more closely approximate the consistency of the amazing cranberry-pecan-oat cookies at a place I once worked, these ones needed more butter and flour, and less sugar.  But...there were also slightly incoherent in terms of taste as well as structure.  Are they sweet?  Salty?  Crunchy?  Mushy?  This all sounded good to me, but I was left feeling a bit unsure of where to focus my tastebuds.  That said, I would also be curious to try cardamom instead of allspice, which has been pretty excitingly successful in other cookies.

Oatmeal Cranberry Nut Cookies

Ingredients
1 TB ground flaxseed + 3 TB water
3/4 c vegan butter
1/3 c sugar
3/4 c brown sugar
1 tsp vanilla
1/2 non dairy milk
1/2 c whole wheat flour
1/2 c white flour
1/2 tsp baking soda
3/4 tsp allspice
1/2 tsp salt
3 c quick oats
2/3 c dried cranberries
2/3 c chocolate chips
1/3 c walnuts, roasted and chopped
1/3 c pistachios, shelled, roasted, and chopped


Instructions

1. Combine water and flaxseed and allow to sit 5-10 min.  Preheat oven to 350*F and line baking sheets with parchment paper.
2. Cream together the butter and sugars until smooth. Beat in the vanilla, milk, and flax mixture.
3. In a separate bowl, combine the flour, baking soda and spice; mix well.  Add to butter-sugar mixture.
4. Stir in the oats, cranberries and nuts.
5. With your hands, roll dough into ping-pong-ball-sized balls, place on baking sheets, and flatten slightly.  Leave space between!  Bake 12-15 minutes or until done. If you are using 2 sheets at once, shift cookie sheets halfway through baking.
6. Remove the baking sheets from the oven and stand the cookies on the sheet itself for 5-10 minutes before transferring it to the cooling rack and let it cool completely.  Makes about 40 cookies.

Friday, October 8, 2010

Slow-Cooked (!) Lentil Chili with Coconut Milk

For my birthday, Devon gave me a crock pot!  And then, the whole next week, we had temperatures in the 100s.  Sigh...  When the weather turned about a week ago (only a week!?), I finally got to use it.  Task one: make perfectly cooked (formerly dried) chickpeas.  Done.  Task two: make a stew, duh.

There are some good veg*n slow cooker cookbooks, but I'm not a totally enthusiastic convert just yet.  For one, vegetarian food is often more about the variety of vegetables and spices in a dish, as opposed to a roast, which is mostly about the quality of the meat, no?  Accordingly, even a slow-cooked vegan recipe involves a fair amount of chopping and measuring, maybe even some sauteeing or pureeing.  Moreover, leaving it on while I'm away at school/work makes me nervous--I'm the kind of person who blows out a candle if she goes to the other room.  Then again, there are still huge perks to the slow cooker: for one, it puts out almost no heat, a godsend in hot weather.  Maybe it uses less energy--but, I use a gas stove, and my grad student salary qualified me for a reduced gas rate, so I'm not sure it's worth figuring out.  In any case, it definitely makes cooking stock, rice, and dried legumes easier (though I have heard that rice-cooking in a slow cooker is controversial).

And finally, in this, my first real crock pot experience, I found that it cooked differently.  Things just didn't get overcooked: the carrots and the lentils were tender, but still totally intact.  I'll have to try a recipe I've already made before I can comment on how this kind of cooking affects the flavor as well.

But, the flavor of this dish is pretty spectacular.  I started with a recipe in Robin Robertson's Fresh From the Vegetarian Slow Cooker, but I swapped out all the major ingredients (cauliflower, potatoes, kidney beans out; lentils and carrots in), another Theseus's-ship situation.  I kept the spices mostly the same, though, and they're awesome!  Not at all your typical imported "curry" flavor.  In fact, the combination of allspice, tomato, and fennel, with mustard, cumin, turmeric, ginger, and chilies, was refreshing and harmonious--it tasted equally like really great chili and a good Indian dal.  The tomatoes without any added sugar made it taste a bit sour, but a lot of the spices are pretty "warm" tasting.  This recipe made a ton, but I am okay with that.

I have held off on posting this recipe for several days until I got a good picture, but you know, it looks very much like the last coconut-lentil stew.  It tastes so different, though!  That one is slightly sweet, while this one is tangy with a taste almost of pizza or spaghetti-os (it's the fennel seed).  They're both really good.

Lentil Chili with Coconut Milk
(adapted from "Indian Cauliflower and Kidney Bean Stew with Coconut Milk" in Fresh From the Vegetarian Slow Cooker)

Ingredients
2 TB olive oil
1 onion, chopped
2 cloves garlic, minced
1 tsp minced ginger
1 small hot chile, minced (this was pretty spicy; reduce or omit if you wish)
1/2 tsp mustard seeds (whoops--the recipe called for dried mustard, which tastes pretty different)
1/2 tsp fennel seeds, ground
1/2 tsp ground cardamom
1/2 tsp ground allspice
1/4 tsp cumin seeds, ground
1/4 tsp turmeric
1/4 tsp cayenne pepper
1 1/2 c uncooked lentils, rinsed
2 large carrots, sliced
1 14.5-oz can diced tomatoes
4 c veg stock
salt and pepper, if desired
1 c canned coconut milk

Instructions
1. Turn slow cooker on "high," add oil, and then cook onion, garlic, ginger, chile, and spices for 5-10 minutes, covered.  Then reduce heat to "low" and add remaining ingredients except coconut milk.  Cook for 6-8 hours.
2. Add coconut milk about 15 minutes before serving. Serves 6-8.

Tuesday, October 5, 2010

Tangy Tahini Noodles with Tempeh and Vegetables

Clean-out-the fridge carelessness took me somewhere new last night!  I had some leftover veggies, and it was cold, so I decided to make a stir-fry dish that was maybe a bit like this cold noodle salad from awhile back.  BUT, I also had two little batches of homemade salad dressing that I wanted to use up: one was an Asianish vinaigrette, with seasoned rice vinegar, tamari, sesame oil, canola oil, and sesame seeds.  The other was straight-up miso-tahini sauce thinned with water.  I couldn't decide which to put on the noodles, so I used both, and it was fantastic!  Tahini adds a richness, almost like cheese or cream, but the vinegar (and the bit of sugar in it) was a flavor I don't often cook with.  I don't like foods that taste like vinegar, but this ended up being just the right amount to add a whole new dimension to the dish without dominating.

I regret that the measurements for the dressing are guesses.  They're probably good in relation to each other, but not necessarily to the rest of the dish.  Just do it by taste until I have a chance to recreate this dish and actually measure.  You'll also want to be careful with the oil and tamari--since you add each ingredient twice, it might be easy to overdo it.  And, since there's miso too, you'll definitely want to be cautious about making it to salty.  You could always reduce the sauce to its bare bones--miso or tamari, tahini, and vinegar--but I think the reason this tasted so good was because of the doublings that went on.

Also, please don't not make this recipe because it calls for nori.  It's just the seaweed sheets that are used to wrap sushi rolls; you can get it at any Japanese grocery or Whole Foods, or omit it.  It adds a great oceany taste and chewy/crunchy texture.

Tangy Tahini Noodles with Tempeh and Vegetables

Ingredients
1 lg block tempeh, cut into 1/2-in cubes
3-4 servings pasta (I used whole wheat spaghetti)
1 TB olive oil
1 onion, chopped
3 cloves garlic, minced
1 TB ginger, minced
1 small hot chile (I used serrano), minced
1-2 carrots, thinly sliced on a diagonal
1-2 c sugar snap peas
other veggies as desired
*
dressing (please note that these measurements are total guesses):
1 tsp canola oil
1 tsp tamari
1/2 tsp sesame oil
1 TB seasoned rice vinegar (or, rice vinegar + sugar)
1 TB sesame seeds
1 tsp tahini
1 tsp miso
2 TB water
*
toasted nori, cut into little strips

Instructions
1. Steam the tempeh in a strainer or steamer (which is itself in a saucepan of water) while you are prepping the veggies.
2. When the tempeh is done, remove from saucepan and set aside.  Use the tempeh water leftover to cook the noodles, adding more water if necessary.
3. While the noodles are cooking, heat oil in a large skillet over medium high heat.  Cook the onions until slightly soft and fragrant (about 5+ minutes).  Stir in garlic, ginger, and chile, and cook another minute or so.  Then add tempeh and carrots, cook a few minutes, then add peas (basically, put in first the things that need to cook the longest).
4. While everything in the skillet is cooking, combine the dressing ingredients separately and mix well.  Add a tiny bit of tamari to the skillet near the end.   Turn off heat.
4. When pasta is done (and maybe slightly underdone), strain and rinse as directed.  Add pasta and dressing to the skillet, mix well.  Serve hot or cold, topped with toasted nori strips.  Serves about 4.

Sunday, October 3, 2010

German Chocolate Cupcakes

I think this was the best of the three cupcakes, but it's probably the worst photo!  Alas...

I combined the basic (but perfect!) chocolate cupcake recipe--which has already appeared in S'mores Cupcakes, Chocolate Espresso Cupcakes, and Chocolate Mint Cupcakes--with a coconut fudge frosting in Vegan Cupcakes Take Over the World.  This frosting was amazing: chewy, and nutty, and interesting...and at the end of the whole process, I lifted the chocolate ganache recipe from the S'mores cupcakes, and drizzled that over the top, so it really was not unlike eating a Caramel Delite (or Samoa, apparently).  In adapting the recipe, I used walnuts instead of pecans, and got a more spreadable frosting by using nuts and coconut that were quite finely chopped.


The relationship between the brown sugar and the coconut milk continually changed through the process, but it was always a beautiful one.

This just in (10/6/10): leftover frostings of all kinds taste really good on graham crackers, and the Coconut Walnut Fudge Frosting tastes amazing on pretty much everything (including graham crackers), but especially apple slices.

German Chocolate Cupcakes

Chocolate Cupcakes

Ingredients
1 c soy milk
1 tsp apple cider vinegar
1/2 to 5/8 c turbinado sugar
1/3 c corn oil
1 tsp vanilla extract
1/2 tsp almond extract
1 c all purpose flour
1/3 c cocoa powder
3/4 tsp baking soda
1/2 tsp baking powder
1/4 tsp salt 

Instructions
1. Preheat oven to 350*.  Line cupcake pan with papers.
2. In a pyrex, combine soymilk and vinegar and set aside for 10 minutes.
3. In one large mixing bowl, combine flour, cocoa, baking soda, baking powder, and salt.
4. In another mixing bowl, combine sugar, oil, vanilla, and almond extract.  Then add curdled soymilk-vinegar mixture.  Then add flour mixture to the wet mixture.  Don't overmix.
5. Fill tins to approximately 2/3 full.
6. Bake cupcakes for 20 minutes.  Then, let them cool for 10 minutes before removing from tin.  Makes 12 cupcakes, but only if you're stingy on your portion size.

Coconut Walnut Fudge Frosting

Ingredients
1/4 c soymilk
2 TB cornstarch
pinch of salt
3/4 c coconut milk
1 c brown sugar (reduce?)
1 c shredded unsweetened coconut
1/2 c walnuts, well-chopped
1 tsp vanilla

Instructions
1. Whisk soymilk, cornstarch, and salt together in a pyrex; set aside.
2. In a large saucepan over medium heat, combine coconut milk and brown sugar.  Cook while stirring until mixtures begins to boil.  Reduce heat and simmer 5 minutes.
3. Add soymilk mixture slowly, then simmer about 7 minutes.  Stir constantly.
4. Remove from heat; stir in remaining ingredients.  Allow to cool before using.  Frosts about 16 cupcakes.


Chocolate Ganache
Ingredients
1/3 c chocolate chips
2 TB vegan butter
1/2 tsp vanilla extract

Instructions
Heat ganache ingredients in a double-boiler setup (or in a microwave?).  When completely melted and combined, remove from heat.  When cool, spoon the mixture into a plastic bag, then cut off the tip and "pipe" chocolate onto cupcakes.

Ginger-Pumpkin Cupcakes with Maple-Vanilla Buttercream Frosting

It's so annoying how all the cans of pumpkin go into hibernation from January to September.  Really?  Why wouldn't I want pumpkin bread, pumpkin cookies, pumpkin muffins, and now pumpkin cupcakes, at all times of the year?  (this is also true of fresh cranberries)

But for the first week in October, Trader Joe's built a small mountain of cans at the entrance to their store at Sunset and Vine.  So we're good.  For a while, anyway.

I won't be caught again with a request for pumpkin bread in June and no pumpkin to be found!  It's a reverse-harvest kind of thing the grocery stores have driven me to: stock up on cans during the bountiful winter months, and then hope that they last through the summer.

These cupcakes were the least pretty of the three (pretty lumpy), but I got to compensate by taking my pastry decorating set on its first run.  It felt exactly like using cheez whiz in a can.  Mmmm...

Both the cake and the frosting on this one were really lovely.  I think the cake was a little too moist and heavy for some cupcake snobs, but it's pumpkin bread in cake form--what are you going to do?  The flavor was very good, if a bit too sweet; it had plenty of spices, which are probably the best thing about pumpkin desserts.  I followed Kelly's recipe on Vegan Thyme to the letter, except I didn't have crystallized ginger, so I just doubled the dry stuff.  For the frosting, I omitted the cinnamon (but sprinkled it on after), and used maple syrup instead of soy milk.

Ginger-Pumpkin Cupcakes with Maple-Vanilla Buttercream Frosting

Ginger-Pumpkin Cupcakes
(adapted from Vegan Thyme)

Ingredients
1 2/3 c flour
2 tsp baking powder
1/2 tsp fine sea salt
1 tsp ground cinnamon
1/2 tsp ground nutmeg
1/4 tsp ground cloves
1/2 tsp ground ginger
3/4 c vegan butter (I used earth balance instead of salted margarine, which is why I cut down on the additional salt)
1 1/2 c light brown sugar (try 1 c)
1/2 tsp vanilla extract
1 c canned pumpkin
2 eggs (I used Ener-G Egg Replacer: 3 tsp mixed with 4 TB of warm water)

Instructions
1. Preheat oven to 325* and line muffin tin with cupcake papers.
2. Combine dry ingredients; set aside.  Prepare egg replacer and set it aside.  In another bowl, cream the butter and brown sugar, then add egg replacer, pumpkin, and vanilla.
3. Add dry to wet; don't overmix.  Spoon into baking pan.  Bake for about 20 minutes, until they pass the toothpick test.  Makes about 14-16 normal-sized cupcakes.

Maple-Vanilla Buttercream Frosting
(adapted from Vegan Thyme)

Ingredients
1/4 c vegan butter
1/4 c vegan shortening (I used earth balance's shortening sticks)
2 c powdered sugar
1/2 tsp vanilla extract
1 TB maple syrup
cinnamon

Instructions
Cream butter, shortening, and sugar.  Then, add vanilla extract and maple syrup.  Beat until fluffy, adding milk or sugar as needed to achieve desired consistency. Frosts about 12 cupcakes.

Orange Cupcakes with Chocolate Buttercream Frosting

Oh man, here it comes!  I made three kinds of cupcakes for a party this weekend.  And I'm finally at a place where the leftovers don't even appeal to me--maybe I've finally reached my sugar limit.  For a day or two, at least.

This is the first of the three, and it was my least favorite, although it did receive some very positive feedback.  Personally, I would have liked more orange flavor and less sugar.  Nevertheless, the combo of orange and chocolate, though controversial, is a nice one, and a chance to once again use the amazing chocolate frosting from The Joy of Vegan Baking that I used last year on Amanda's cupcakes.  It was also a chance to break down and buy a zester, one of those gadgets that always seemed too specific to be worth buying--up to this point, when I have used "zest" in a recipe, it's actually been grated peel.  This is fine for baking, cooking, etc., but it would not do for decorating.


I used Minneola tangelos rather than oranges.  I think they are the most perfect citrus fruit in the entire world: amazing tangerine flavor, juicy, easy to peel, larger than a tangerine, and shinier, smoother, and oranger than most oranges.

The cooking time for this recipe seemed to be off: as was true with other cupcakes, they were done after about 15 minutes, but the recipe called for over 30.  Curious.  The texture of the cake was a little too soft and dense for my tastes (shouldn't it be like a little cloud of sugar?), and I worried that this was due to the baking time discrepancy.  But if it passes the toothpick test, surely it's time?


Orange Cupcakes with Chocolate Buttercream Frosting

Orange Cupcakes
(adapted from Holy Cow!)

Ingredients
1 1/2 c flour
2 tsp baking powder
1/2 tsp salt
1 c orange juice
1 tsp grated or zested orange peel (or more?)
1/3 c canola oil
2/3 c sugar (or less?)
1 tsp vanilla

Instructions
1. Preheat oven to 350* and line muffin pan with cupcake papers.
2. Combine flour, baking powder, and salt, and set aside.  Combine remaining ingredients in a separate bowl.
3. Add the wet ingredients to the dry ingredients and mix.  Do not overmix.
4. Divide the batter equally among 12 cups.  Bake in a preheated 350-degree oven 15-20 minutes or until a toothpick inserted in the center comes out clean.  Makes 12 cupcakes.

Chocolate Buttercream Frosting

Ingredients
1/2 c Earth Balance
2 c powdered sugar
1/2 c cocoa powder
1 tsp vanilla extract
1 tsp almond extract
3-4 TB nondairy milk
(if needed)

Instructions
Cream butter and sugar.  Add remaining ingredients.  Beat until fluffy, adding milk or sugar as needed to achieve desired consistency.  Frosts 12-16 cupcakes.

Friday, October 1, 2010

Coconut-Lentil Stew

Unless you've been living under a rock, you've probably heard about the weather in LA recently.  It has been VERY HOT and NEARLY APOCALYPTIC.  I do not like it.  I bought an air conditioner.

Wednesday evening, you could feel the tension in the air.  Now, in Minnesota, this happens about every other week, but in CA, such a changement de temps is much rarer.  Out of nowhere, it started raining, for--literally--the first time in about seven months.  This rain didn't last very long, but it was nevertheless impressive.  Look what it did to the sky:


Anyway, a change of weather, no matter how small, can seem significant in relation to what you had before.  The Voracious Vegan (who lives in in Saudi Arabia) writes about how Pumpkin Spice Cookies suddenly appeal to her once the temperature drops below 100.  Well, just the same, once this front broke (even though it's really still far too hot for October), it became appropriate to make lentil stew--warm, thick, hearty lentil stew.  I used a recipe from 101cookbooks, but I simplified it according to the ingredients I didn't have.  The coconut milk and the raisins (don't worry, not too many!) make this a little more interesting than your typical lentil stew.  Then, at the end, I added mint (not pictured, unfortunately), which I think worked really well with the other flavors.  I should also note that the curry powder I used (from Mark Bittman's recipe) is not your typical curry powder--it's a bit more like garam masala than storebought curry powder.  I kept an eye on the liquid and didn't add so much that I had soup instead of a dryer, stewy dish... because it may be cool enough for lentils, but soup seemed a little less appealing, given that temperatures are still in the high 80s.  :(


Coconut Lentil Stew
(adapted from 101cookbooks)

Ingredients
1 cup lentils, rinsed
3.5 c water
1 medium carrot, cut into 1/2-inch dice
1 TB fresh peeled and minced ginger
1 TB curry powder
1 TB olive oil
1/2 yellow onion
2-3 TB raisins
2-3 TB tomato paste
1/2-1 c coconut milk
1/2-1 tsp fine grain sea salt
chopped fresh mint

Instructions
1. Put lentils, water, carrot, and ginger in a large pot, bring to a boil, then reduce heat, cover, and simmer for 30 minutes.
2. Meanwhile, in a smaller skillet or pot, toast the curry powder, dry, over medium low heat for a minute or two.  Set the curry powder aside.
3. Heat the oil; saute onion and raisins for 5-10 minutes, then add tomato paste and saute a few minutes more.
4. When lentils are soft, add toasted curry powder, saute mixture, coconut milk, and salt.  Simmer 20 minutes more.  Adjust seasonings to taste.  Serve hot, garnished with chopped mint.  Serves about 4-5.