Showing posts with label baking. Show all posts

Saturday, September 3, 2011

Moong Dal Parathas

It's bread and dal all in one.

You make them separately and then you bind up the beans in a little dough pouch.

And then you roll it out (messy!) and cook it.  This is a good way to round out a vegetable dish, like my favorite baingan bharta, which doesn't have much protein on its own.


Moong Dal Paratha

Ingredients
1/2 tsp cumin seeds
1/2 small onion, finely chopped
1/2 c mung beans, rinsed (and soaked?)
1/2 tsp red cayenne pepper
1/2 tsp ground coriander
1/4 tsp turmeric powder
juice of 1/2 lime or lemon, to taste
salt to taste
a few sprigs of fresh cilantro chopped
1 c whole wheat flour
oil for cooking

Instructions
1. In a non-stick pan, add 1/2 tsp oil, add cumin seeds and onion. Then add the moong bean, sauté, add some water, cover with a lid and let it cook until soft. Keep an eye if the water drains to prevent burning of moong bean. Once cooked and water has evaporated, add the chili powder, coriander powder, lime juice, turmeric powder, salt, mix well and turn off the heat; let it cool. Then add cilantro.
2. Mix 1/4-1/2 tsp salt with flour and slowly add some water to it until it forms a dough to be able to roll. Cover it with a plastic wrap and let is sit aside for at least 20 mins. Take a small piece of dough and place it between your palms, make a round ball. With a rolling pin, roll the dough, sprinkle some wheat flour if necessary to prevent sticking. Roll to about 5 inches in diameter. Place a spoonful of moong bean in the center of the dough, pull the edges of the dough and cover the stuffing. Roll the dough further into a thin round shape about 10 inches in diameter.
3. Heat a pan, place the rolled paratha. After about 1 minute on medium flame, flip it. After about 2 mins, drizzle 1/2 tsp oil on top of the paratha then flip it again. Press it with a spatula all over to form a golden brown color. Flip it to cook on the other side and get golden brown. Take it off from heat and serve hot.  Makes about 16 parathas.

Tuesday, August 30, 2011

Gluten Free Brownies with Walnuts

So, again, I've been meaning to get into more gluten-free baking, but some commonly-used ingredients are expensive and/or hard to find.  I was surprised to see at my local Jon's recently these particular nondescript shakers (I've gotten everything from za'atar to flaxseeds in these shakers).

 Now, I know that serious gluten-free baking would need to use more reassuringly gluten-free ingredients (like Bob's Red Mill or something).  But let's be honest, the ghost of glutinous baking projects past is probably haunting every corner of my kitchen; it'll never be totally pure.

I'd also like to point out the prices of these items, AND the fact that I also purchased "Awesome Bleach" that day.

Anyway, weeks passed and nothing happened to my weird little cannisters.  I also had a pound of dates still sitting in my fridge from when I made the crust for the frozen raspberry cashew cake last month.  And then a recipe comes along that calls for exactly what you have!  Well, except for the cherries in Chocolate Chip Cherry Brownies.

In replacing the 1 cup of cherries, I thought about maintaining the same approximate amount of sweetness, pectin, and just plain bulk.  I ended up using 1/4 c additional dates and 3/4 c walnuts.  Sadly, I didn't have quite enough chocolate chips, so I ended up just melting the entire 1 3/4 c that I had, rather than melting 1 1/2 c and folding in an additional 3/4 c later.  I also used soymilk instead of almond milk, and I chopped and soaked the dates in the milk before processing to give them a head start.

I love the idea of using a date-and-milk puree as a base!  The pectin in the dates makes the liquid so thick.

The batter tasted pretty great; it was incredibly sticky and fudgy.

And indeed, the finished product, straight out of the oven, was also fudgy and delicious.  The next day, though, the texture was a little bit dry and mealy.  I'm going to try reheating them, but I think these are best eaten right after baking--which has nothing to do with their lack of gluten--what brownie doesn't taste best when it's still warm from the oven?

Gluten Free Brownies with Walnuts
(adapted from manifest vegan)

Ingredients
about 16 dates
1/2 c nondairy milk
1 tsp vanilla extract
2 1/4 c non-dairy chocolate chips, divided
1 c superfine brown rice flour
1/3 c potato starch
1 tsp salt
3/4 c walnuts, toasted

Instructions
1. Soak the dates, coarsely chopped, in the nondairy milk.  Preheat oven to 350*.  Oil a an 8 x 8 inch baking pan.
2. Combine pitted dates and non-dairy milk, and vanilla into food processor and puree until very smooth.
3. Over double boiler, melt 1 1/2 c chocolate chips. Pour the melted chocolate into the date mixture and blend again until super smooth. 
4. In large mixing bowl combine  brown rice flour and potato starch and salt
and mix until well combined. Fold in remaining chocolate chips and toasted walnuts.
5. Transfer to pan.  Bake for 20-25 minutes, then allow to cool before cutting into squares and serving.

Friday, July 8, 2011

Berry Cornmeal Muffins

I've been trying to cut some of the gluten out of my cooking, mostly for the lil lady.  When I get back from spending most of July in London, I'm going to invest in some of that fancy schmancy stuff like spelt flour, brown rice flour, xantham gum, etc... but for the time being, oatmeal and cornmeal have been great friends.

(ok, yes, there is controversy about whether and when oats are gluten free)

(unfortunately it's not like this controversy)

This muffin recipe (which I found just by gooooogling) uses less wheat flour because it uses some cornmeal.  Baby steps.  Also, delicious.  I'm still using the fruit from the commercial shoot that Sarah worked on last month; this time, it was blueberries.  This muffin would have been a little bit dense and dry if it weren't for the luscious blueberries in every bite.  They were actually really great, especially with a bit of earth balance on them.

I subbed in 1/2 c wheat flour (and used 1 c white flour for the remainder).  I also used a flax egg instead of a chicken one, soymilk instead of dairy milk, and turbinado sugar instead of white sugar.  Using frozen berries meant that the muffins took considerably longer to cook (about 7 min more); the key is to watch and test frequently, even if it means that some of the muffins will have holes in them from your testing.

Berry Cornmeal Muffins

Ingredients
1 c white AP flour
1/2 c whole wheat flour
3/4 c cornmeal
1/2 c sugar
4 tsp baking powder
1/4 tsp salt
zest of one lemon
1 c fresh or frozen berries (blueberries, raspberries, and/or blackberries)
1 egg (1 TB ground flax + 3 TB water, allow to sit for 10 minutes before using)
1 c nondairy milk
1/4 c canola oil
1 tsp vanilla extract
2 TB turbinado sugar

Instructions
1. Preheat oven to 400*  Butter or spray with a non stick cooking spray 12 muffin cups. Can also line with paper liners.
2. In a large bowl combine the flour, cornmeal, sugar, baking powder, salt, and lemon zest. In a separate bowl combine 2 TB of this mixture with the berries.
3. In a large measuring cup or bowl whisk together the egg, milk, oil, and vanilla extract. 
4. With a rubber spatula fold the wet ingredients into the dry ingredients and stir only until the ingredients are combined. Gently stir in the berries. Do not over mix the batter or tough muffins will result. 
5. Evenly fill the muffin cups with batter, using two spoons or an ice cream scoop. Sprinkle with the sugar.
6. Place in the oven and bake until lightly browned and a toothpick inserted in the center of a muffin comes out clean, about 15-20 minutes (I used frozen berries and it took closer to 25-30 min). Transfer to a wire rack and let cool for about 5 minutes before removing from pan.  Makes 12 regular sized muffins.


*

Oh hey, we also made more tempeh sausage like this.

Monday, July 4, 2011

Veganomicon Cookies

More recipes are on their way, I promise!  Just not today.

Because of some particular people I know and would like to bake for, I've been meaning to get into gluten-free baking for quite a while.  Unfortunately, most gluten-free baking ingredients are both more expensive and harder to get hold of than your typical glutentastic all-purpose flour.

Oats are a notable exception to these issues.  Now, I'm well aware that oats aren't exactly gluten-free, depending on both whose oats and whose bellies are concerned.  Still, it was an easy step in that direction (spelt flour, which I've only worked with once, would be another baby step).

So, I made these chocolate chip oatmeal cookies from Veganomicon.  They expanded a ton, and were crispier and more delicate than traditional cookies.  If you're making your own oat flour out of oatmeal, be sure to measure the oats after whizzing them around in the food processor, because they will definitely lose volume in the process.


"Wheat-Free Chocolate Chip Cookies" from Veganomicon

*

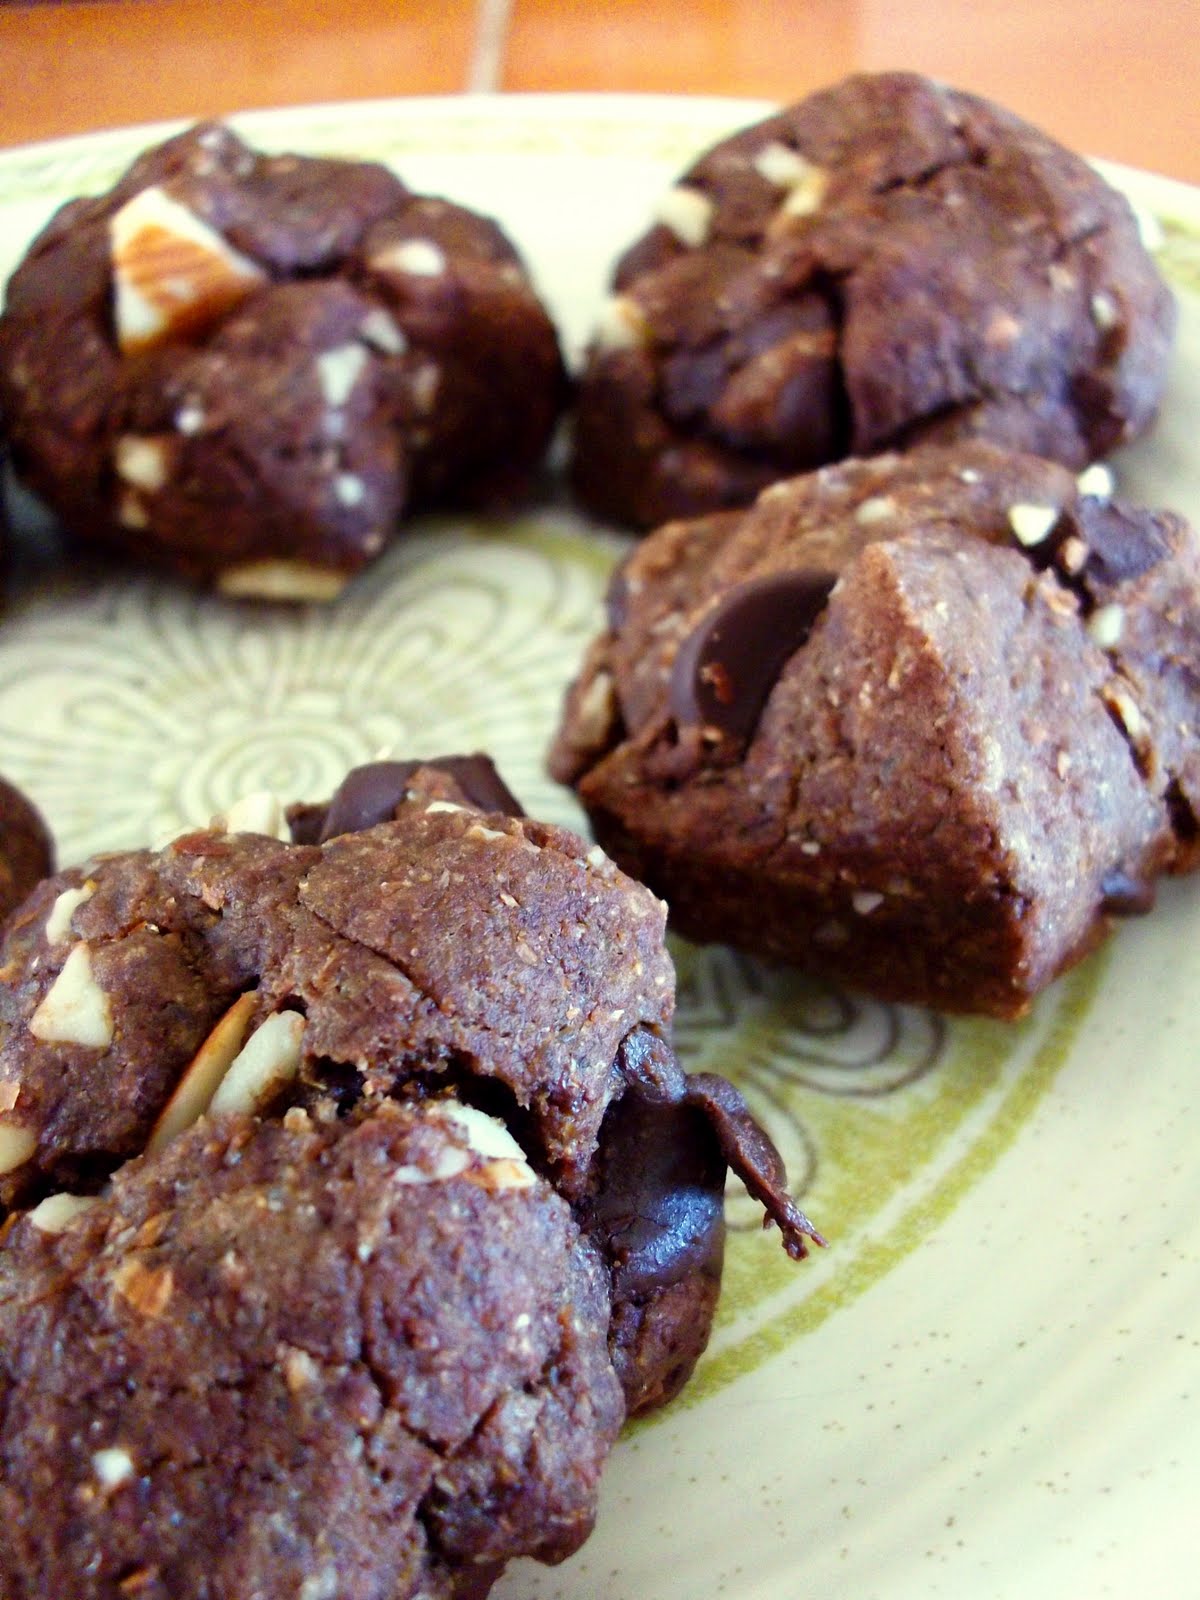
Speaking of Veganomicon cookies (of the gluten-full kind), I also made these chocolate chocolate chip cookies from the same cookbook after reading about them on eggless cooking.  I used chopped almonds instead of walnuts because a certain chocolate cookie monster doesn't like walnuts.  These were delicate and fudgey, but they got stale rather quickly.


based on "Chocolate-Chocolate Chip-Walnut Cookies" in Veganomicon

*

And... a random dinner: vegetable sushi (with carrots, avocado, chives, and cucumber filling), sauteed kale (with garlic, ginger, lemon, sesame oil, and sesame seeds), and Celeste's mushroom leek soup.


Wednesday, June 22, 2011

Caraway Beer Bread

This bread was baked with some amount of anticipation because it was super fast and used two very exciting ingredients: beer and caraway seeds (obviously).  Like this other beer bread, I think the beer is not so much for leavening as it is for flavor (yeasty/malty, sort of compensates for it being a baking powder bread rather than a yeasted one).

Though the caraway seeds are zingy and fun, though, I've yet to meet a soda bread that I'm really excited about.  Fresh out of the oven, slathered in earth balance, it tastes awesome (don't most things? [don't answer that]).  But as early as the morning after, it feels stale, dry, dense; it lacks flavor... which is why I made a funny-looking half loaf (pictured below). 

Does anyone have a really awesome quick bread recipe?  I mean, a bready one (not pumpkin bread or something like that, where the sugar, oil, and pumpkin all add to the moistness).

Caraway Beer Bread
(from food.com)

Ingredients
3 c all-purpose flour
1 TB baking powder
1 TB sugar
1 tsp salt
2 TB caraway seeds (don't overdo this--it won't look like that much, but a little goes a long way)
12 ounces beer, room temperature 
2 TB vegan butter, melted 

Instructions
1. Heat oven to 350*F.  Coat a small loaf pan with cooking spray.
2. Mix flour, baking powder, sugar, salt, and caraway in a large bowl.  Add beer; stir in liquid into flour mixture just until flour is moistened.  Scrape into pan.
3. Bake at 350*F for 50 minutes.  Brush top with half of melted butter, then bake 10 more minutes or until lightly browned.
4. Remove loaf from oven and brush on remaining butter.  Cool somewhat, then serve warm or at room temperature.  Makes one (9x5) loaf.

Sunday, June 12, 2011

Blackberry Pie

Some of all that frozen fruit (mostly blackberries, but also some strawberries) went into making this pie.  I love how few ingredients a pie can have and still come out just right.  The filling: fruit and cornstarch (and maybe sugar).  The crust: flour, oil, and salt.  Seriously!

I loved this pie (especially once it firmed up--it was better the second day).  The filling just had this really dense and tart berry flavor, and the whole wheat flour gives the crust a fantastic texture.  We ate it with coconut bliss ice cream, which I think is the only grocery store vegan ice cream worth getting.  So good... and it, too, only has three ingredients: coconut milk, agave, and vanilla.

Mixed Berry Pie with Whole Wheat Oil Crust
Whole Wheat Oil Pie Crust

Ingredients
1 1/4 c white flour
1/2 c whole wheat flour
1/2 c vegetable oil
1 tsp salt
3-4 TB of cold water

Instructions
Preheat oven to 375.  Combine flour, oil, and salt.  Add water until you have dough.  Roll dough between 2 sheets of waxed paper, on top of a slightly wet countertop.  Transfer to a 9-in pie pan; extra crust can be rolled out and cut into fun shapes or thin strips as a topping, or cooked off in a frying pan as a snack, or frozen for later use.  Poke crust with a fork and bake 15-20 min.  I suggest placing a sheet of parchment paper over the crust and weighting it down with dry beans; this helps the crust keep its shape.  Remove crust from oven and set aside until you're ready to fill it.

*

Mixed Berry Pie Filling
Ingredients
LOTS of berries (far more than you think you need)
0-1/2 c turbinado sugar (to taste)
1/4 c cornstarch, mixed with a bit of cold water
2 TB lemon juice

Instructions
In a saucepan, cook fruit with some water until it begins to soften. Add remaining ingredients and cook for a few minutes, until well mixed. Transfer to pie crust. Top with reserved crust pieces and brown sugar, if desired.  Bake pie at 425* for ten minutes, then at 350* for an additional 40-50 minutes, until filling is bubbling and crust begins to brown. Allow to stand and cool before serving.  It will seem way to mushy to be done, but if you let it sit and cool for at least a few hours, it will firm up just fine.

*

Reference cupboard: conversions, "bean math," legume and grain cooking times and water ratios.

Friday, June 10, 2011

Muffins and Sausages


My girlfriend Sarah (wait?  does she mean girlfriend?) recently worked on a commercial shoot that involved craploads of fresh fruit... which wound up in my fridge!  It was a little overwhelming for a bit there: tons of strawberries, blueberries, and blackberries, ten mangos, two pineapples, and ten bananas.

But, freezers are our friends!  I washed, trimmed, chopped, and froze almost all of it--the equivalent of many dollars of frozen fruit, just waiting for smoothies, pies, curries, breads, etc.  Yay!


First thing I did with the fruit that didn't get frozen was make some muffins... I used the recipe for berry muffins in Vegan Brunch, but too much multitasking was going on, and I know I messed it up somehow (3 c of flour instead of 2, maybe?), because I had to add a LOT of milk to get batter consistency.  I know using fresh berries instead of frozen also affects the cooking time, but it was more than that.  I wasn't thrilled about the results (though Sarah said they were just fine), but we nevertheless ate them or gave them away quickly enough that I didn't get a decent photo.

Muffin Carnage

*

Pancakes from Vegan Brunch have also continued to happen, with great success.  Sometimes they have blueberries in them.


*

On the topic of breakfast, I recently made an impulse buy at wholefoods and got a pack of Field Roast's Italian sausages.  Now, I pretty much never buy "fake meat products" (tofu and tempeh are different, since they have one ingredient).  But I looked at the list of ingredients and thought, I could make this exact sausage at home.  It's simply wheat gluten, vegetables, and spices.  So that's cool... and the sausages taste really great... but they sort of sit in the bottom of my stomach for hours, as if my body isn't sure it can actually digest them.  Is it a gluten thing?  I'm inclined to pooh-pooh the hordes of upper-middle-class white people who only as of very recently imagine that gluten has singled them out as torture victims (as if insisting on soymilk and egg-whites-only-omelettes was no longer enough to make them special)... but yeah, something about these sausages doesn't sit well with me.  Not that this keeps me from ordering one (at a 500% markup) every time I go to Blue Palms for happy hour.

Still, unless I'm feeling really lazy, I could make my own.  Or I could skip the gluten bomb altogether and return to my standbys of tempeh sausage filling, tempeh sausage triangles, and the amazing oat and rice sausage.

Field Roast Italian Sausage, lightly fried, with sprouted rye bread and raspberry jam in the background

And yes, I know the title of this post is "muffins and sausages."

Friday, March 18, 2011

Almond Lime Coconut Cookies

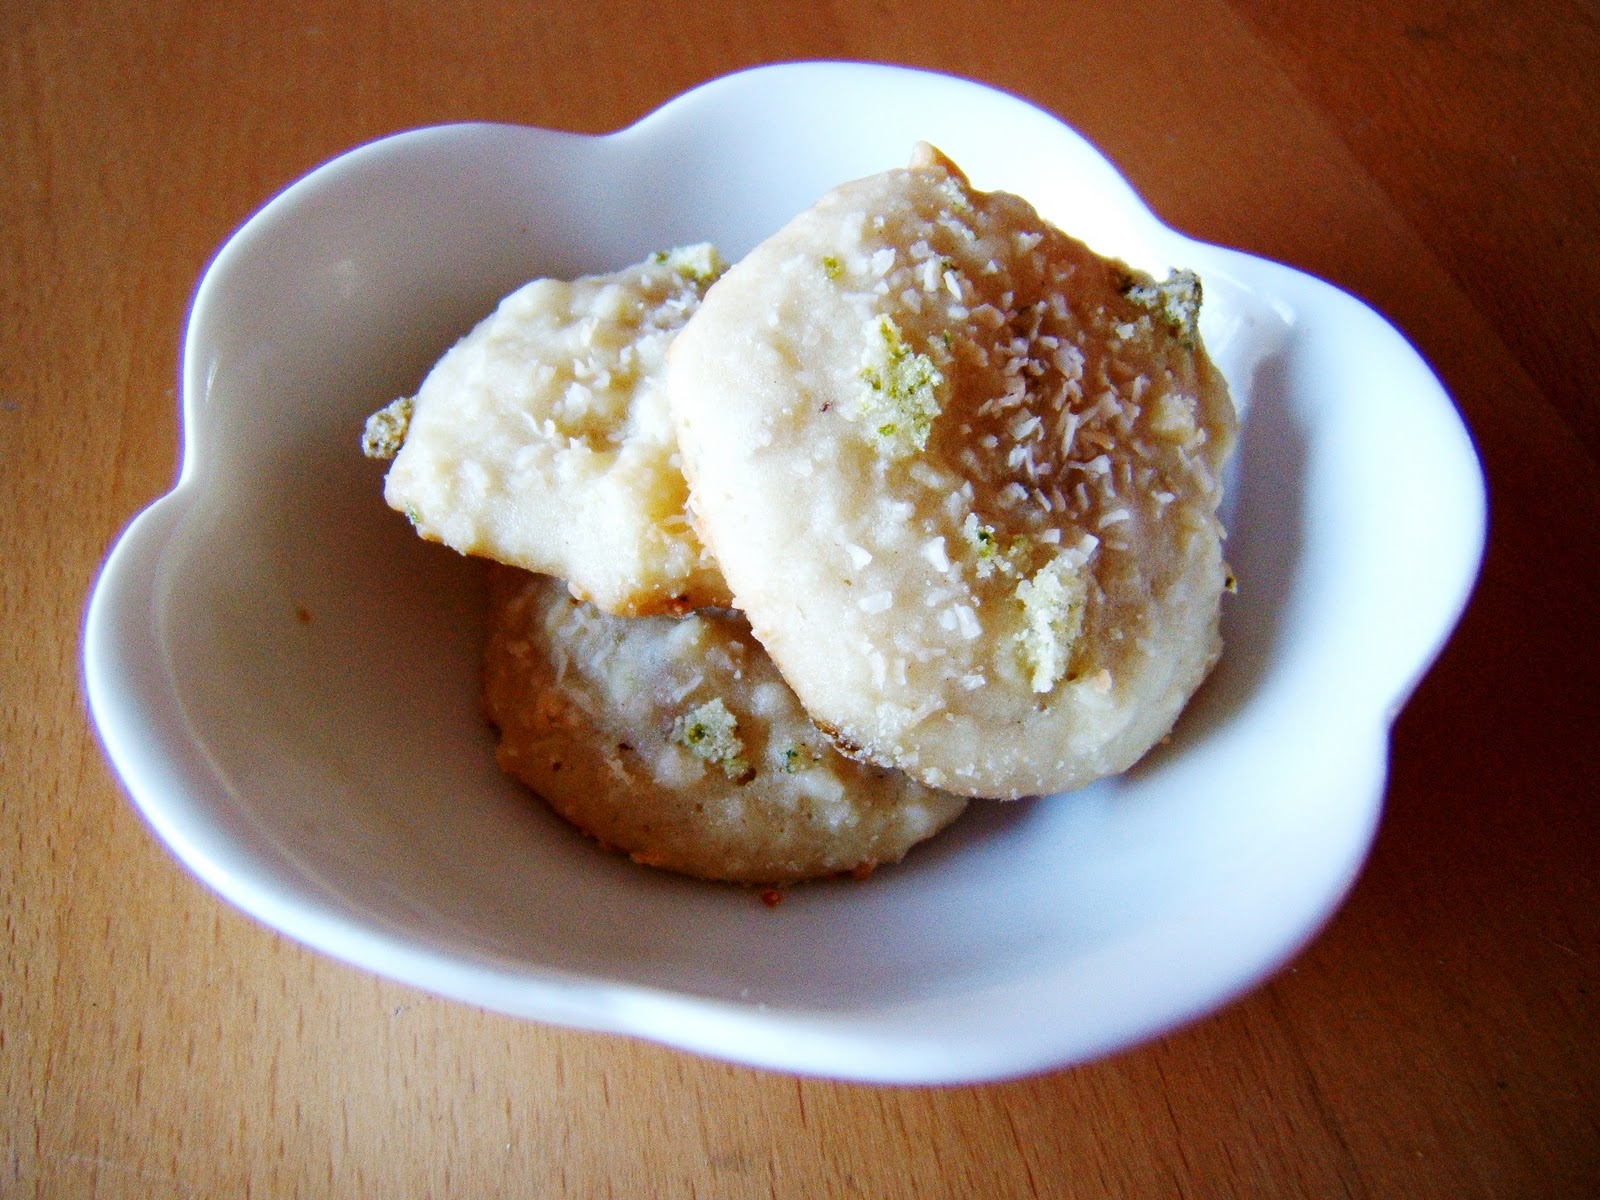
Check out these cookies from ecurry made with equal parts flour and almond meal.  I think it's really cool that you can make them on the stove (!), but I found them to be a bit unsatisfying.  I'd have like more butter, or vanilla, or something.  In fact, for a similar cookie, I'd probably turn instead to these amazing almond cookies or the rum walnut cookies.

However, the coolest part of this recipe wasn't even the stovetop thing; it was the lime sugar: after grinding sugar together with lime zest in a clean coffee grinder, I had magical green sugar with an intense lime flavor!  This is a groundbreaking discovery.


Indian Lime Cookies
(from ecurry)

Ingredients
1/4 c fine almond meal (I blanched and ground up raw almonds)
1/4 c all purpose flour
1/4 c powdered sugar
1.5 TB ghee or melted butter
1 TB milk/cream
1 tsp lime or lemon zest
1 tsp fine sugar
coconut flakes to garnish the top (optional)

Instructions
Mix together almond meal, all purpose flour, half the zest, confectioners’ sugar, cream/milk and ghee. Work the dough until it comes together, and no longer crumbly. Pound together the rest of the zest and the superfine sugar. This will be a lime colored sugar.
Divide the dough in to 8-10 portions. Flatten them between the palm of your hands to form discs about an inch in diameter. Carefully place each cookie on a baking sheet, and flatten the cookies with your finger – to 1.5-2 inch diameter. Top with a sprinkle of lime sugar and nuts (if you are using them).
In a pre heated oven at 350 degree F, bake for 8-10 minutes or until the edges get light golden. (in my convection oven, the cookies were done in 6-8 minutes).Place the cooked cooking on a cooling rack or plate. The cookies will crisp once they are cool.
To cook the cookies on stove top:
Work in batches; make flatten four balls of dough to 1 inch discs and place them on a cold nonstick frying pan. Using your fingers, flatten them further so they are as thin as possible, about 1.5 -2 inches in diameter. Top with a sprinkle of lime sugar and nuts (if you are using them).
Place the pan over stove and cook over very low heat for 7-8 minutes. Once the base is light golden, flip them over with a spatula and cook this side over very low heat for about 4 minutes. Try not to let this side turn brown or even golden. Place the cooked cooking on a cooling rack or plate. The cookies will crisp once they are cool. Work with the second batch in the same way.

Saturday, February 19, 2011

Homemade (Vegan) Thin Mints!

I have created thin mints!  There's a feeling of triumph in replicating a product so trademarked, so anticipated, so singular.  I also realized how much more decadent a chocolate-covered cookie is than a normal cookie (though the uncoated cookies were pretty good on their own).

With this recipe from Chloe Coscarelli, the taste but not exactly the texture of the thin mint was recreated.  I couldn't get the cookie quite crunchy enough, a texture that is really only desirable in relationship to the creaminess of the outer chocolate coating.  Doing something along the lines of this recipe from alien's day out, which uses oil instead of vegan butter, might help on the texture-authenticity front.  Still, no one was complaining about the slight softness of the cookies.

No cookie is safe.  Caramel delites / Samoas will be next.


Vegan Thin Mints
(from chef chloe)

Instructions
 wafer cookies:
1 1/4 c all-purpose flour (I used 3/4 c white, and 1/2 c wheat)
1 c sugar (I used 3/4 c)
1/2 c cocoa powder
1/4 tsp salt
1/4 tsp baking soda
3/4 c vegan margarine
3 TB nondairy milk
1 tsp vanilla extract
1/2 tsp peppermint extract
chocolate coating:
4 c dairy-free semi-sweet chocolate
2 TB vegan margarine
1 tsp peppermint extract

Instructions
Wafer Cookies: 
1. In a bowl mix together flour, sugar, cocoa powder, salt, and baking soda.  With a fork, cut in butter, then also add milk, vanilla, and mint extract.  Knead with your hands in the bowl for one minute.  Chill the dough in the refrigerator for 1 hour.
2. Preheat oven to 350* F and line two large baking sheets with parchment paper.  Remove dough from refrigerator.  Roll a heaping teaspoon of cookie dough into a ball and place onto prepared baking sheets, leaving about 3 inches in between each ball. Evenly flatten the dough with your fingertips so that it is about 1/4 inch thick and bake for 12-14 minutes. Let cool completely.
Chocolate Coating:
3. Melt chocolate chips and margarine over a double boiler or in the microwave. Stir in the mint extract and mix until smooth. Dip completely cooled cookies into the chocolate and remove with a fork, gently scrapping off excess chocolate using the side of the bowl. Or, spread a thin layer of the chocolate on top of the cookies. 4. Place cookies on a parchment-lined plate or tray and refrigerate until chocolate coating sets. Store in the refrigerator.  Makes about 3 dozen cookies.

Saturday, February 12, 2011

Mango Cornbread

I made this mango cornbread from Holy Cow! to go with the Hyderabadi Bagara Baingan I recently posted about.  Most cornbread recipes are actually part cornmeal and part wheat flour, so I was skeptical but interested when I saw that this recipe was all cornmeal.  Besides the flax seed, I think the reason this recipe stays coherent is the amount of mango puree; it works as a binder, like applesauce does in other recipes.  I was a little disappointed that the mango and coconut flavors were so subtle: I love cardamom, but it really dominated the taste of the cornbread.  Finally, because quick breads don't seem to stay fresh for long, I actually halved this recipe and made it in a loaf pan, cooking it for about five minutes less than the recipe specifies.  But the recipe below makes a more standard amount; you can probably make it in an 8x8 baking dish.

Oh, and original author Vaishali took far better photos than these, so you can just go to her blog and pretend those are the photos you're seeing here...

Mango Cornbread
(from holy cow!)

Ingredients

2 c stone ground cornmeal
1 1/2 tsp baking powder
2 tsp ground cardamom (or less)
1/4 tsp salt
*
1/4 c canola oil
3/4 c sugar (I only used 1/2 c)
2 TB ground flax seed
*
1 1/2 c mango pulp (for me, this was a puree of 4 small mangoes)
1/2 c coconut milk

Instructions
1. Preheat oven to 350*.  Oil a baking dish.
2. Mix dry and wet separately.  Add mango and coconut milk to wet mixture, then add dry mix as well.
3. Pour the batter into pan and bake around 35 minutes or until a toothpick inserted in the center comes out clean.  Fills an 8x8 baking dish.

Sunday, February 6, 2011

Mamool (Middle Eastern Butter Cookies)

For those who have been wondering, my brother Colin finally left Egypt this past Wednesday and is now back in the US.  I know he's bummed about having to leave his program, but given the way the last few days have unfolded it seems as though he picked a very good time to go.  It's also amazing how being in the right (wrong? no, I think right) place at the right time has resulted in a network news appearance (on ABC, in D.C.), a letter to the Atlantic, a mention on NPR, and a quote in the Chronicle of Higher Education.  He has also written a new post on his blog (seriously, check it out) about his experiences living five minutes' walk from Tahrir Square, from which he has allowed me to quote:

"while walking through Tahrir on Tuesday, a Muslim Brotherhood guy gave me a cookie. I tried to politely refuse, but when he insisted, I qualified, even though I'm American? He smiled and replied, especially because you're an American. Ad infinitum, this is the anecdote I will tell about the Brotherhood."

I use this anecdote in an admittedly rather tenuous connection to the rest of this blog post, as mamool is apparently more Lebanese than anything.  We can nevertheless celebrate the power of cookies--to welcome people into one's home, to seduce their hearts and souls, and perhaps to further international understanding.  In any case, it's a pretty great story.

I think I found this recipe a while ago when I was looking for new ways to use mazaher (orange blossom water).  And Oh. My. Goodness.  These are good cookies.  Buttery and flaky but not overly sweet, they're like a shortbread cookie with a decadent and aromatic filling.  The flavor of the orange blossom water is strong without being overwhelming, and I added some almond extract to the outside dough as a counterpoint to that flavor.  I wouldn't change anything about the recipe, but I definitely could improve on my method.  For one, a google image search has informed me that mamool are usually way prettier, thanks to the help of an elegant cookie-mold-thing.  Since that was out of the question, I experimented with different methods and shapes (samosa? turnover?) before realizing that the easiest and best looking way to do it was to flatten out small portions of the dough as much as possible (see below), then put a small amount of filling in the middle of the circle, pull up the sides of the circle around the filling, pinch it closed, and then roll it as if there were nothing inside at all.

A little bit fussy, but once I got the hang of it, it was alright.  The dough was too dry, however, and I had to add a few tablespoons more liquid (soymilk and/or water) in order to get a dough that could handle all this manipulation.  I'm guessing that the tradeoff was a slightly tougher cookie, but I'm not complaining.

No eggs were called for, but I did add some cornstarch, not only as a binder, but also because the original recipe called for farina, which appears to be a more processed wheat flour product.  And again, I also added almond extract, which is one of my favorite things in the world (exhibit b: amazing almond cookies).

I also discovered a new method for melting larger amounts of butter: less fussy and more energy-efficient than using a double boiler or the toaster oven, I put the butter in a metal bowl on a cookie sheet into the oven that was preheating anyway (see photo at right)!  I guess if you have a microwave this is less of a revelation, but I don't.

 
Mamool (Middle Eastern Butter Cookies)
(from cooks.com)

Ingredients
dough:
4 c white all-purpose flour
1 c sugar
1 TB orange blossom water (the original recipe suggests using rose water as a variation; I'd like to try this too)
1/2 tsp almond extract
1 1/2 c melted butter (I used Earth Balance)
1 TB soymilk, plus more as needed
*
filling:
2 c ground walnuts
1/4 c sugar
1 TB orange blossom water
2 TB butter, melted

Instructions
1. Combine filling ingredients and set aside.
2. To make the dough, combine flour, sugar, and butter; add milk and flavoring. Knead well. Form into small patties, flatten in palm of hand; fill with 1 teaspoon filling and close tightly (see above notes for more information about how I did this).  Poke each one with a fork (is this necessary?  I'm not sure, but I thought better safe than sorry).
3. Bake in 350* oven until lightly browned on the bottom (about 10 min), then broil until tops are lightly browned.  Watch them very closely under the broiler!  I burnt about six of them because I stepped away for a minute.  If desired, sprinkle with confectioners' sugar when cool.  Makes 2-3 dozen.

Wednesday, December 29, 2010

Roasted Chestnut Cookies

And here were are again, chestnuts.  I found you to be unspectacular from the outset, but I thought, perhaps putting you into a cookie would redeem you.  I made this recipe from Smitten Kitchen, but something was missing.  Now, I have recently learned that chestnuts are the least fatty of all nuts, but maybe my particular batch was even less rich than most.  In any case, this cookie needed way more butter.  As they were, these cookies were more like scones-- fit to be dunked in coffee, but not really cookies in their own right.

Actually, come to think of it, these were really bomb scones.  But yeah, kind of lame cookies.
Roasted Chestnut Cookies
(adapted from Smitten Kitchen)

Ingredients
1/2 c vegan butter, room temperature (or more--see headnote)
1 c powdered sugar
1 tsp vanilla extract
1/4 tsp ground cinnamon + additional for coating
pinch nutmeg
1/8 tsp salt
1 c all purpose flour

Instructions
1. Once the peeled chestnuts are fully cool, chop them coarsely on a cutting board. Measure 1/2 cup of chopped chestnuts, and dump them in the bowl of a food processor. Grind them until they are very well chopped, then add the softened butter, and pulse again until combined. Add 1/4 cup of your powdered sugar, vanilla extract, 1/4 tsp cinnamon, nutmeg, salt and flour and pulse until an even dough is formed.
2. Wrap dough in plastic, chilling for one hour or until firm. Once chilled, preheat the oven to 350°F. Whisk remaining 1/2 c powdered sugar and a few pinches of cinnamon in a small bowl. Set aside. Working with one half of the chilled dough at at time, roll it into 2 teaspoon-sized balls in the palm of your hand. Arrange on parchment-lined baking sheet but no need to leave more than 1/2 inch between the cookies; they won’t spread.
3. Bake cookies until golden brown on bottom and just pale golden on top, about 14 to 17 minutes.  Cool cookies 5 minutes on baking sheet. Gently toss warm cookies in cinnamon sugar to coat completely. Transfer coated cookies to rack and cool completely. Repeat procedure with remaining half of dough. To touch them up before serving, you can sift some of the leftover cinnamon-sugar mixture over them.  Makes about 2 dozen 1-inch cookies.

*

In other news, the sun finally came out for a while when I was making these cookies, though both preceded and followed by thunder and lightning.

Tuesday, December 21, 2010

Chocolate Candy Cane Cookies

There was a moment today when I thought, the addition of candy canes probably improves every recipe.  Then I thought about pizza, and sauerkraut, and fried rice... and decided to retract this hypothesis.

Still, adding candy cane pieces to Fat Mints resulted in cookies both pretty and delicious.  I used flax instead of commercial egg replacer, I only used 1/4 c whole wheat flour (the overall amount stayed the same), I added 1/4 c crushed candy canes (3 canes), and accordingly, I reduced the mint extract by half.  This time I also made them a little bit bigger than I usually make the Fat Mints (but not so big that I needed to adjust the cooking time).

The candy canes liquefy and then resolidify in the baking/cooling process, resulting in very pretty chunks that feel even harder than when they started.  It's worth the nervousness about your teeth, though.  These cookies are sort of like brownies on the inside, very chocolatey.

Chocolate Candy Cane Cookies
(adapted from Fat Mints)

Ingredients
1 TB ground flax + 3 TB warm water
1/2 c vegan butter
1/2 c brown sugar
1/4 c white sugar
1 tsp vanilla
1/4 tsp peppermint extract
1 1/2 c white flour (or substitute 1/4 c whole wheat)
1/4 c cocoa (unsweetened)
1 tsp baking soda
1/4 tsp salt
1/2 c semisweet chocolate chips
1/4 c chopped candy canes


Instructions
Preheat oven to 350*. Line baking sheets with parchment paper.
In a pyrex, whip together flax and water; set aside.
In a large bowl, cream together butter and sugars. Add flax "egg" and extracts.
In another large bowl, combine flours, cocoa, baking soda, and salt. Add this to the butter mixture and mix well. Then add chocolate chips and candy cane pieces. Using a fair amount of pressure, press dough into small blobs, then roll into spheres.
Place cookies on parchment paper-lined sheets. Flatten slightly with your hand or a glass.
Bake for 10 minutes. Cookies will still be soft, but they will begin to crack open, and a toothpick inserted will come out clean. Allow cookies to sit and cool on baking sheet before moving them (they are fragile at first!). Makes about 3 dozen small cookies or 2 dozen medium.

Wednesday, December 8, 2010

Candy Cane Cupcakes!

Cupcake recipes pose some interesting structural problems.  What counts as a "cupcake recipe"?  Is it the cake?  The combination of icing and cake?  If it's the same cake but a very different icing, is it a new cupcake recipe or just a new icing recipe, seeing as icing rarely, if ever, stands on its own?

The cake recipe is the same old perfect chocolate cupcake recipe I've been using all along, in chocolate mint and chocolate espresso cupcakes, in S'mores cupcakes, and in German chocolate cupcakes.

This time, for the icing, I went off the buttercream recipe from Vegan Thyme, but I omitted the cinnamon and added 1/4 tsp peppermint extract.  At this point, I had a better mint buttercream than the one I made so long ago for my very first post.  Using some shortening instead of all butter/earthbalance makes it stiffer, fluffier, and less weirdly buttery.  Then I ground up 1 or 2 candy canes (for a single, 12-cupcake recipe) and mixed them into the frosting.  After frosting the cupcakes, I ground up another one more coarsely and used the chunks and dust to decorate the tops.

OH.  And I took my leftover frosting and put it in little blobs on waxed paper into the freezer.  I think I may have accidentally figured out how to make the butter mints I used to adore.

But ugh... Between a double batch of these, a batch of the chocolate chip cardamom cookies, and a batch of the amazing new almond cookies, I used over 8 cups of sugar in one day.  That's not counting the chocolate chips and the candy canes, either.  When we actually got to the party, I didn't want any more cookies, having sampled quite a few in the production stages.

Candy Cane Cupcakes

Chocolate Cupcakes

Ingredients
1 c soy milk
1 tsp apple cider vinegar
1/2 to 5/8 c sugar
1/3 c canola oil
1 tsp vanilla extract
1/2 tsp almond extract
1 c all purpose flour
1/3 c cocoa powder
3/4 tsp baking soda
1/2 tsp baking powder
1/4 tsp salt 

Instructions
1. Preheat oven to 350*F.  Line cupcake pan with papers.
2. In a pyrex, combine soymilk and vinegar and set aside for 10 minutes.
3. In one large mixing bowl, combine flour, cocoa, baking soda, baking powder, and salt.
4. In another mixing bowl, combine sugar, oil, vanilla, and almond extract.  Then add curdled soymilk-vinegar mixture.  Then add flour mixture to the wet mixture.  Don't overmix.
5. Fill tins to approximately 2/3 full.
6. Bake cupcakes for 20 minutes.  Then, let them cool for 10 minutes before removing from tin.  Makes 12 cupcakes, but only if you're stingy on your portion size.

*

Candy Cane Buttercream Frosting
(adapted from Vegan Thyme)
Ingredients
1/4 c vegan butter
1/4 c vegan shortening (I used earth balance's shortening sticks)
2 c powdered sugar, plus more as needed (I ended up using more like 2.5 c)
1/2 tsp vanilla extract
1/4 tsp peppermint extract
2-3 candy canes

Instructions
Cream butter, shortening, and sugar.  Then, add extracts.  Beat until fluffy, adding milk or sugar as needed to achieve desired consistency.  Then grind up 1 or 2 candy canes and mix them into the frosting.  After frosting the cupcakes, grind another one more coarsely and use the chunks and dust to decorate the tops. 
Frosts about 12 cupcakes.

Amazing Almond Cookies

Tonight was the annual department holiday party.  My party planning colleagues did a fantastic job delegating tasks, organizing entertainment, and having Lebanese food catered from Sunnin.

I was one of several people who baked what was cumulatively a lot of dessert.   Along with the cardamom chocolate chip cookies and some cupcakes (forthcoming), I tried out a new recipe for an almond cookie from Veganomicon.  They were fantastic!  Out of my three desserts, they were the slowest to go, but they were actually my favorite.  The almond flavor was so intense, they weren't too sweet, and the texture was absolutely perfect--and weirdly, they contained neither butter/earth balance nor an egg replacer!  This is all the more amazing given the fact that the recipe includes brown rice syrup, which (if you ask me) typically effs everything up in baking.

I honestly could have just eaten the dough when I made these; it was like marzipan, especially since I (for once) used no whole wheat flour and since the recipe includes ground up almonds.  Ok, so I did eat a lot of the dough.  But it won't give you salmonella or anything...

The changes I made to the original recipe were minimal: I omitted the toasted sesame oil because I was baking for a crowd and didn't want to push my luck given the cardamom in the other cookies.  Also: I blanched raw almonds and then ground them finely in a spice grinder (it seems to work better than my crappy mini-food-processor), I'd use a bit more salt than in the original recipe, and I needed far more sliced almonds for the final step than the 1/3 c the original recipe called for.  Other than that... this recipe was pure gold.

Amazing Almond Cookies
(adapted from "Terry's Favorite Almond Cookie" in Veganomicon)

Ingredients
2 1/4 c all-purpose flour
1/2 c ground blanched almonds (or almond meal)
1 1/4 tsp baking soda
3/4 tsp salt
*
1/2 c canola oil
1/4 c brown rice syrup
1/4 c non dairy milk
1 c sugar
1 1/2 tsp almond extract
1/2 tsp vanilla extract
*
3/4 to 1 c sliced almonds

Instructions
1. Preheat oven to 350*F.  Line baking sheets with parchment paper.
2. Combine dry and wet ingredients in two separate bowls.  Then, add dry to wet and mix until you have dough.
3. Pour out the sliced almonds onto a plate.  Roll the dough into small balls, then smoosh them down into the almonds on one side.  Place them almond side up on the baking sheet, and smoosh them further with the bottom of a glass or a measuring cup.  Bake for 12-14 minutes, until the edges/bottoms begin to brown.  Allow to stand a while before transferring to a cooking rack.  Makes at least 3 dozen smallish cookies.

Tuesday, November 30, 2010

Orange Blossom Anzac Cookies

I used to joke about proposing a Watson Fellowship project on "Flatbreads of the world."  While that never panned out, it seems I could do a scaled-down project on "Oatmeal cookies of the Commonwealth," given my attempts at flapjacks and now this.

The Anzac biscuit is a cookie from Australian and New Zealand that dates back to World War I.  Apparently, the original Anzac biscuit was not very delicious; it resembled hard tack and was valued for its long shelf life, which enabled it to be sent overseas to soldiers.  In their current, more delicious form, the cookies typically contain oats and coconut (it now occurs to me that anzac cookies are very similar to garam masala cookies).  They're also notable in that they do not use eggs due to wartime shortages.  So, they're vegan by default (especially since the original recipe would use golden syrup rather than honey).

The cookie (excuse me, 'biscuit') is actually protected by law, which means the name can't be affixed to anything but the original basic recipe and cannot be used in conjunction with the word cookie.  That's just in Australia... right?

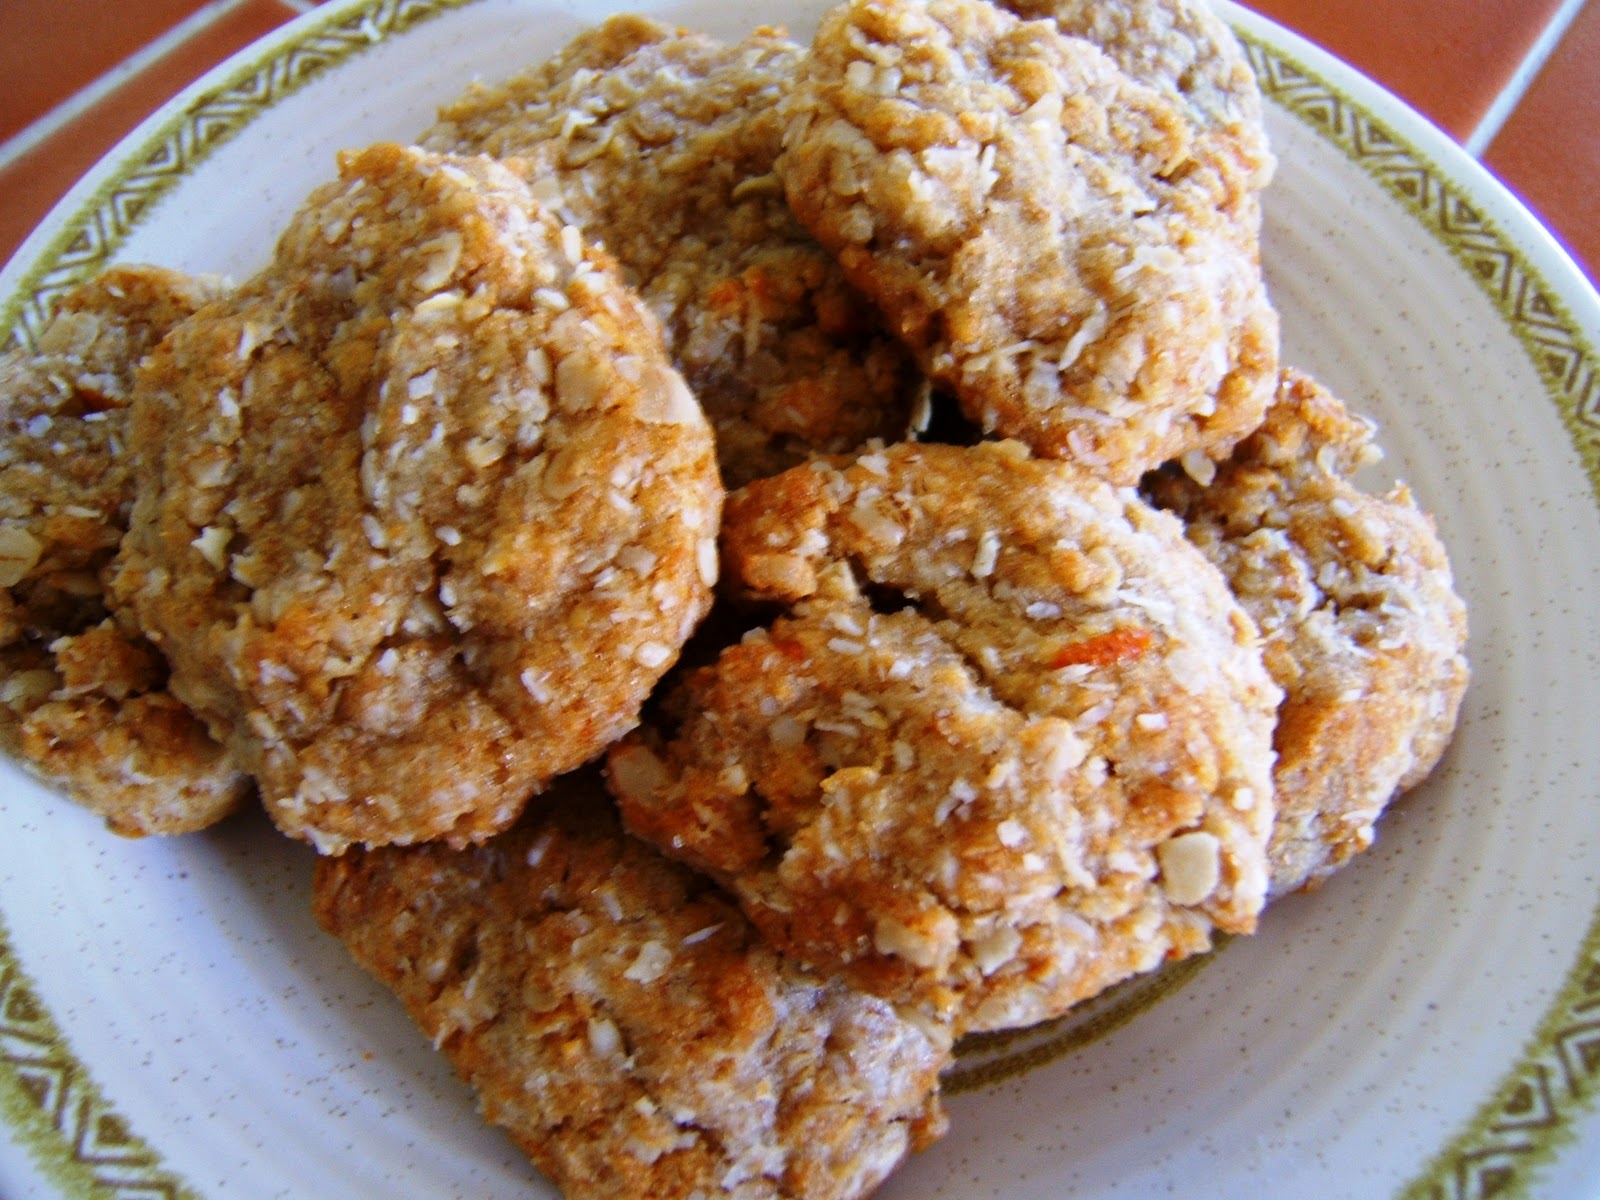
For indeed, like the garam masala cookies, these ones have yet another spin on them.  I have been itching to use the mazaher, or orange blossom water, I picked up a while ago.  Wouldn't you know, Heidi Swanson came to the rescue.  I thought it was pretty crazy to put mazaher in an anzac cookie, but it was one of the best things I've ever tasted.  And, given that the Anzac corps served in Egypt, I'm sure there's some sort of tenuous connection to be made between the Australian cookie and the Middle Eastern flavoring.

But this cookie is going to go up there in my top five, and that's a serious matter.  It was interesting and buttery and textured and fragrant (just enough orange water and zest) all at once; crispy on the outside and deviously chewy on the inside.  And, for reasons unknown to me (the amount of butter? the orange zest?), the cookies turned the most beautiful yellow-gold color when they baked.

The recipe worked really well.  Adding baking-soda-water to hot melted butter and honey produces a science-experiment-like reaction; I'm not sure why this is done, but it's pretty fun.  The only thing I think I changed was I didn't quite use the zest of a whole medium orange; I wanted the orange blossom water to be the focal flavor.

I'm sure that if you left out the zest and/or the mazaher you would still have a very delicious cookie.

Orange Blossom Anzac Cookies

Instructions
1/2 c all-purpose flour
1/2 c whole wheat flour
1 c rolled oats
1/2 c sugar
1/2 c brown sugar
1 c finely shredded non-sweetened coconut
scant 1/2 teaspoon fine sea salt
*
1/2 c vegan butter
2 TB honey, corn syrup, golden syrup (or agave?)
zest of one medium orange (or less, to taste)
*
1 TB boiling water
1/2 tsp baking soda
*
1 TB orange blossom water

Instructions
1. Preheat oven to 325*F degrees. Combine the dry ingredients in a large bowl; mix well.
2. In a small saucepan over low heat combine the butter, syrup (or honey), and orange zest. Stir until melted and remove from heat. In a small bowl whisk together the boiling water and baking soda. Stir it into the butter. Now pour the butter mixture over the big bowl of oats and stir. Add the orange blossom water and stir again. Mix with hands if needed.
3. Form into balls, flatten slightly, and bake on parchment-lined baking sheets.  Bake for about 12 minutes or until deeply golden.  Makes 18-30 cookies, depending on size.

P.S.: The new night watchman says hi.